In the bad old days of motorcycle racing clutches were a pretty simple affair. A racer typically only used it, in anger, once per race when the green flag dropped and only touched the lever for downshifts. The often meant clutches would last an entire season or more with nary a second thought. Long ago, when "racing on a budget" wasn't a punch line, thrifty rider/tuners would simply fit an extra set of washers under the clutch springs to get extra life out of worn plates.
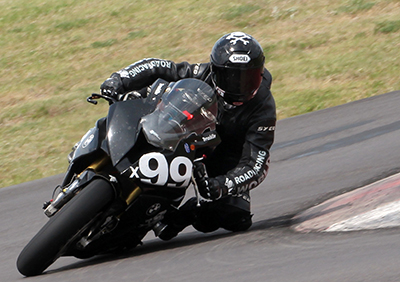
Ben Walters uses a well adjusted and properly maintained slipper clutch
to optimize a corner entrance at Hallet Motorsports park on his way to
an AOD victory. Photo by Tim Turner.
There were, of course, the occasional manifestation of lazy clutch engineers. The throw out bearings welding themselves to the clutch actuating rod on FZRs, the disintegrating ball bearings in the rotary clutch actuators in GSX-Rs and the perennial (typically European) "We just increased the horsepower output of this engine by 50-100% by increasing displacement but we'll use the clutch from the original engine and hope it gets past warranty".
The biggest lurking maintenance issue at that time was cush drives and aftermarket wheels. An amply budgeted racer who took it upon themselves to fit some light weight racing wheels (many of which did not have cush drives) were likely to find themselves with exploding inner clutch baskets as the resulting power pulses, coupled with grippy race tires, made short work of the aluminum.
At some point in the late 90s some clutch engineers started fitting anti-jutter springs and plates to the clutch pack. This had the mixed blessing of providing street rider with smoother clutch action but racers started to experience more clutch failures as the half-width clutch plate often melted during hard starts. The fix was to replace the anti-jutter plate with a full width plate but, of course, that defeated the anti-jutter functionality of the design. This often left us manually oiling the clutch plates (spinning the wheel on the rear stand with the engine off but in gear with the clutch lever pulled in and pouring oil through the oil fill hole) to get one smooth engagement, and, with good fortune, the hole shot.
With the advent of fat grippy tires and high compression engines came the, now historic, rear wheel hop going into slow turns. Entering slow turns with, often, multiple downshifts, the rear wheel would be slowed down by the compression braking of the engine faster than the wheel's required rotations from ground speed. This variance would manifest by the rear wheel trying to hop off the ground. The riding technique to convert this from a liability to an advantage was to ever so lightly apply pressure the clutch lever. This would convert the hop into a slide, often with a slow oscillation of the bike pivoting around the steering stem. Timing the turn in with the position of the rear wheel allowed for sharper apexes.
The manual action of slipping the clutch at corner entrances was eventually replaced by the advent of slipper clutches that, through the clever application of simple machines, would simply slightly disengage the clutch under back torque.
Of course, this means that the clutch is now slipping, not just at the start of the race, but anytime the bike's delta in deceleration is greater than the design limit for the back torque of the clutch. This became apparent to a competitor endurance team who were campaigning the first R1 with a slipper clutch. They had not adjusted maintenance intervals for the increased clutch wear inherent in the design and were unceremoniously stranded in the pits in Fontana looking at the smoking ruins of their clutch plates.
For our endurance bikes, this means stripping the clutch after every race for a thorough inspection. We used to just put a fresh clutch in the bike for each race but when "German clutches" rose to the third highest expense for the team we decided to scale it back to "inspect and replace as needed".
Mostly likely the age of slipper clutches will soon be coming to an end. As many a low tech twins racers have come to understand, you can spoof the action of a slipper clutch, to some extent, by simply raising the idle speed of the engine. It is rough justice, but if you get it just right the higher idle speed can be matched to the grip and deceleration capability of the engine and, no more hop and no need to clutch slip in the braking zones.
Most idle speeds are now controlled by the ECU so it is only a matter of time before the sensors providing for the now ubiquitous traction control, are used to control minimum engine speed under deceleration to provide for all electronic (and ideally, programmable) rear wheel hop/slide control.
That said, most of us are still suffering along with slipper clutches and the attendant care and feeding.
Disassembly
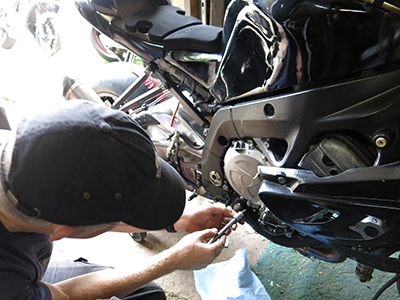
Unbolt the cover.

Oil fill cap is safety wired using an Aircraft Spruce cowling lock pin. The
bolts are numbered in an ad-hoc tightening/loosening sequence, which
helps to keep track of things when the person turning the wrench has/
hasn't had too little/too much coffee.

Loosen the clutch spring bolts a bit.

Then remove them in a criss-cross pattern, perhaps with a speed winder
to hurry things along.
Inspection
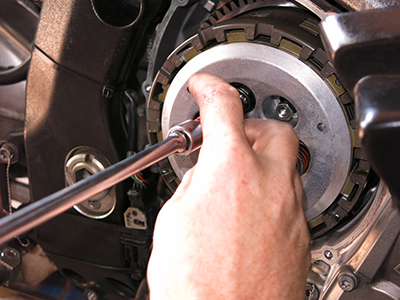
Inspecting the clutch pressure plate and throw out bearing for a smooth
surface, and smooth action.
The slipper clutch spring has three tabs in single shear. Check to see that the tabs haven't broken off. Our Yamaha used to eat this regularly, the BMWs are still on their original springs.

The pressure plate in this clutch had a rough area around the inner
circumference of its surface, which left the outer friction plate in less
than pristine condition. Time for a new clutch package.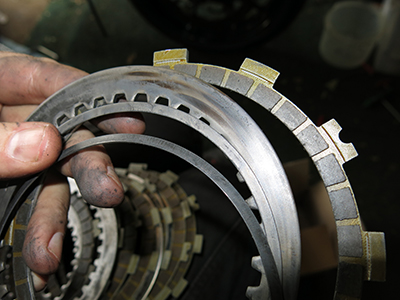
Continuing the inspection, the anti-judder spring pieces are a washer, and
a conical washer that fit concentrically into a friction plate with a larger
minor diameter. This assembly helps to get a smooth launch from a traffic
light or green flag. As this friction plate has less surface area, the pressure/
area relative to the other fricton plates is increased, so it has a harder life
than the other friction plates. It deserves extra scrutiny.

The steel plates also had blued surfaces and spots, which generally signals
the end is nigh. So far the friction plates, pressure plate, and steel plates
have failed the "that looks okay" test.
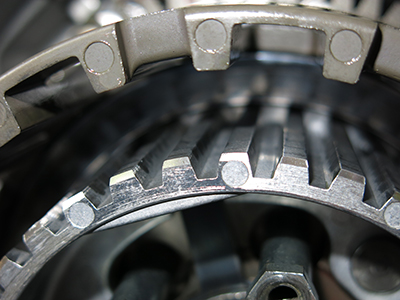
Also, the clutch hub had a suspicious wear pattern that suggested that
the hub was bottoming out on the inside of the pressure plate, which
would perhaps lead to the clutch slipping. The combined thickness of
the friction plates and steel plates created a coincidence of unfavorable
tolerances.
Adjustment

Measuring the stacked plates to determine the assembly thickness.
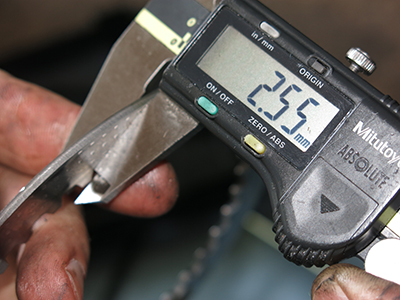
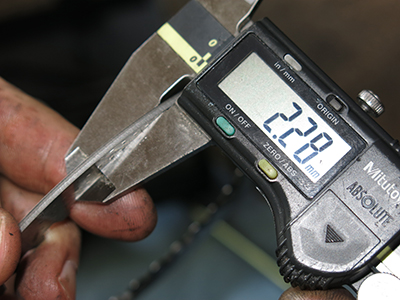
BMW's clutch replacement kit comes with a selection of different thickness
steel plates. The goal was to pick a combination of plates such that the
clutch pack was thick enough to keep the pressure plate from bottoming
out on the end of the hub.
Assembly
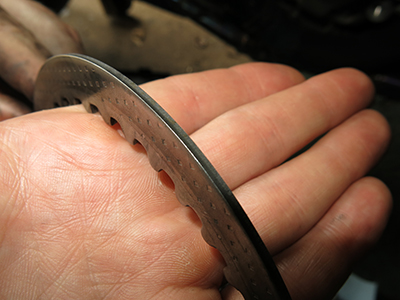
Each steel plate has a flat side and a rounded side. Install them all one
way or the other.

After installing the new friction plates and steel plates
(with all the rounded or flat sides in the same orientation),
replace the pressure plate and springs. Torque the springs bolts.
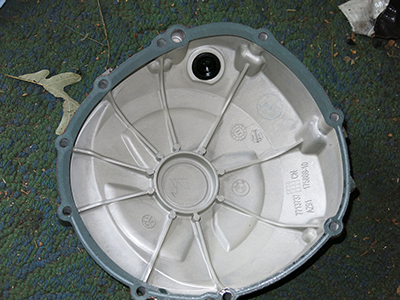
Greasing the (new) cover gasket will keep it from sticking to the cases,
causing anxiety if you have to remove and replace the cover in a hurry.
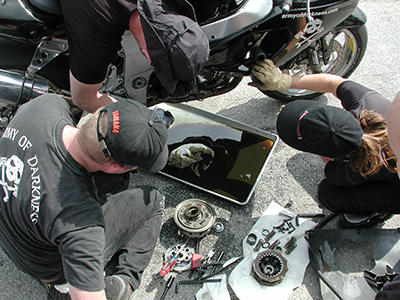
The authors (Tim, Sam, Melissa) perform unscheduled clutch
maintenance under a green flag.
